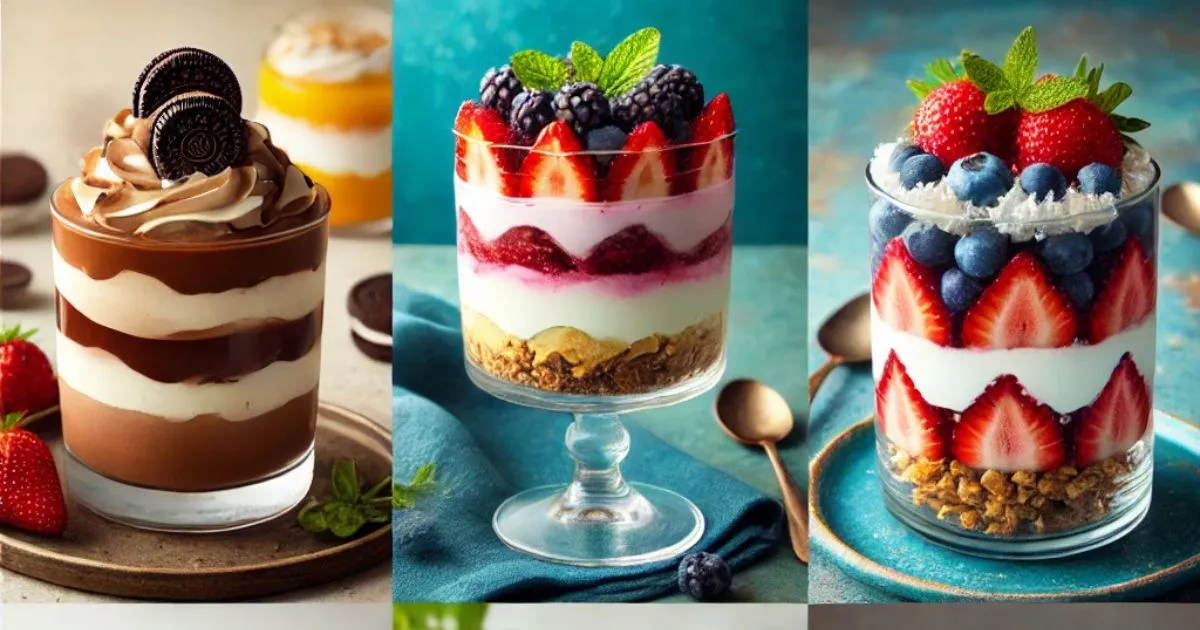
Dessert cups are the perfect way to serve up sweet treats that are both visually stunning and incredibly delicious. These versatile, easy-to-make desserts come in individual portions, making them ideal for parties, weddings, or even cozy family gatherings. From rich chocolate creations to refreshing tropical flavors, there’s a dessert cup for every occasion and taste preference.
In this blog post, we’ll share five unique dessert cup recipes that are simple to prepare and sure to impress your guests. Whether you’re looking for a classic chocolate indulgence or a fruity no-bake option, these recipes have you covered!
Table of Contents
Key Takeaways
Recipe Highlights
- Easy to Make: All five dessert cup recipes are simple and quick to prepare, perfect for those who need a no-fuss treat.
- Versatile: These dessert cups are highly customizable. You can mix and match ingredients based on your taste or what you have on hand.
- Great for Meal Prep: Most of these dessert cups can be made ahead of time and stored in the fridge, making them ideal for parties or busy weeknights.
Unique Features
- Quick Prep: These dessert cups require minimal prep time, so you can enjoy a delicious treat without spending hours in the kitchen.
- Customizable Ingredients: From different fruit combinations to swapping in your favorite cookies or nuts, these dessert cups can be tailored to suit any flavor profile.
- Visually Stunning: The individual portions in clear cups not only make serving easy but also give your dessert cups a beautiful presentation, making them perfect for any event.
These dessert cups are a must-try, whether you’re hosting a party, preparing for a special occasion, or simply indulging in something sweet. Try all five recipes to discover your new favorite go-to treat!
1. Classic Chocolate Dessert Cups
Who doesn’t love chocolate? It’s the ultimate crowd-pleaser, and when served in elegant little cups, it becomes a showstopper dessert. These classic chocolate dessert cups are perfect for any occasion—whether you’re hosting a dinner party, celebrating a birthday, or just treating yourself to something indulgent.
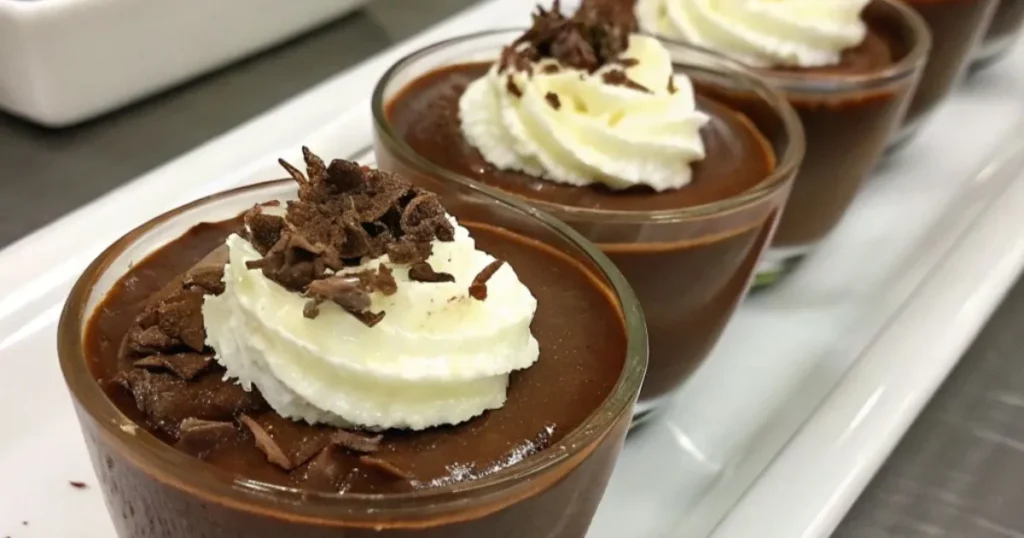
What makes them so irresistible? It’s the layers of velvety chocolate mousse, light and fluffy whipped cream, and a sprinkle of chocolate shavings for that extra touch of sophistication. But don’t let their fancy appearance fool you—these dessert cups are surprisingly easy to make.
What You’ll Need
To create these dreamy chocolate cups, you’ll need just a handful of ingredients:
- Chocolate mousse: You can make it from scratch or use a high-quality store-bought version if you’re short on time.
- Whipped cream: Freshly whipped cream adds a delightful contrast to the richness of the chocolate.
- Chocolate shavings or curls: Perfect for garnish, adding a touch of elegance.
- Optional extras: A layer of crushed cookies or nuts for added texture.
How to Make Them
Let’s break it down step by step:
- Prepare the mousse: If making from scratch, melt dark chocolate and fold it into whipped cream. Chill for a few hours.
- Layer the goodness: In small clear cups, start with a layer of chocolate mousse. Follow it with a dollop of whipped cream.
- Repeat for effect: Add another layer of mousse and finish with whipped cream.
- Garnish: Sprinkle chocolate shavings, add a drizzle of chocolate sauce, or top with a chocolate wafer.
Why These Dessert Cups Are Perfect
- Portion Control: Individual servings make it easy to manage portions without compromising on indulgence.
- Visually Stunning: The layers of mousse and cream look stunning in clear cups, making them perfect for parties.
- Versatile: Customize with different types of chocolate—dark, milk, or even white—for a unique twist.
Tips for Success
- Use high-quality chocolate for the best flavor.
- Prepare these ahead of time and keep them chilled until ready to serve.
- Experiment with toppings—think caramel drizzle, crushed nuts, or a pinch of sea salt for a gourmet touch.
So, why not add a little chocolate magic to your next gathering? These classic dessert cups are guaranteed to be a hit, leaving your guests asking for the recipe. Ready to wow your friends and family with this simple yet stunning dessert? Give it a go, and watch the compliments pour in!
2. Fruity Cheesecake Dessert Cups
Craving a dessert that’s both smooth and refreshing? These fruity cheesecake dessert cups are just what you need. Perfect for summer parties, brunches, or even a quick indulgence after dinner, this no-bake option combines the rich creaminess of cheesecake with the vibrant flavors of fresh fruit.
The best part? They’re incredibly easy to make and require no oven time—just layer, chill, and serve!
Ingredients You’ll Need
Gather these simple ingredients to whip up this delightful dessert:
- Cream cheese: Softened for a smooth, creamy base.
- Graham cracker crumbs: Adds a crunchy, buttery layer for that classic cheesecake flavor.
- Fresh fruits: Strawberries, blueberries, or even mangoes work beautifully.
- Sugar and vanilla extract: For sweetness and a hint of flavor.
- Whipped cream: Optional, but it adds extra lightness to the cheesecake mixture.
How to Make Them
Follow these straightforward steps to create your fruity cheesecake cups:
- Prepare the cheesecake layer: Beat cream cheese, sugar, and vanilla extract until smooth. Fold in whipped cream for a lighter texture if desired.
- Assemble the layers: Start with a layer of graham cracker crumbs at the bottom of your cup. Add a generous spoonful of the cheesecake mixture on top.
- Add the fruit: Arrange fresh fruit over the cheesecake layer. You can use a single type of fruit or mix them up for a colorful presentation.
- Repeat and finish: Add another layer of cheesecake and top with more fruit. For a final touch, sprinkle extra graham crumbs or drizzle with honey.
Tips for Success
- Use seasonal fruits: Opt for what’s fresh and in season to enhance the flavors. Berries in summer, citrus in winter—get creative!
- Make ahead: These cups can be prepared a day in advance and stored in the fridge, making them a stress-free option for entertaining.
- Customize your base:Replace graham crackers with crushed digestive biscuits, vanilla wafers, or even granola to add a unique twist.
Why You’ll Love These Dessert Cups
- They’re no-bake, making them perfect for hot days or busy schedules.
- The individual portions are as practical as they are beautiful.
- The combination of creamy cheesecake and fresh fruit creates a balanced, crowd-pleasing treat.
Whether you’re hosting a garden party or simply craving something sweet and fruity, these fruity cheesecake dessert cups will hit the spot every time. Try them out—you’ll love how easy and versatile they are!
3. Layered Berry and Yogurt Parfaits
Craving something sweet yet wholesome? These layered berry and yogurt parfaits are a perfect balance of indulgence and nutrition. They’re easy to prepare, visually stunning, and a healthier option for dessert. Whether you’re planning a brunch, a quick snack, or a guilt-free treat, these parfaits tick all the boxes.
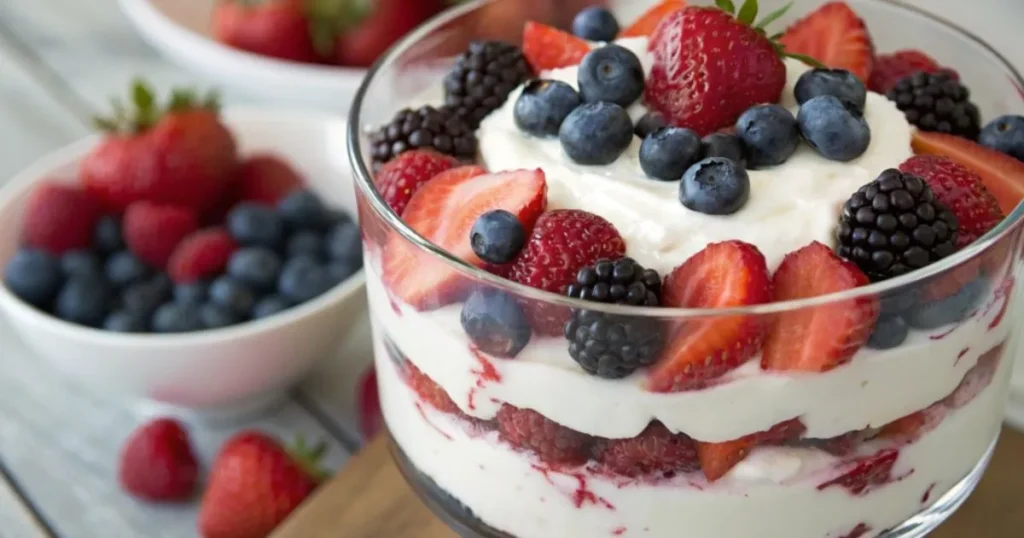
What makes them special is the combination of creamy Greek yogurt, juicy berries, and the satisfying crunch of granola—all sweetened with a drizzle of golden honey. And the best part? You can customize them to suit your taste or the occasion.
Ingredients You’ll Need
Here’s what you’ll need to create these delicious parfaits:
- Greek yogurt: Creamy and packed with protein for a satisfying base.
- Mixed berries: Fresh or frozen strawberries, blueberries, raspberries, or blackberries.
- Granola: Adds crunch and texture.
- Honey: A natural sweetener that ties all the flavors together.
How to Make Them
Building these parfaits is as simple as layering ingredients:
- Start with yogurt: Add a layer of Greek yogurt to the bottom of a clear glass or cup.
- Add berries: Spoon a layer of mixed berries on top of the yogurt.
- Sprinkle granola: Add a layer of granola for crunch and flavor.
- Repeat the layers: Alternate yogurt, berries, and granola until the cup is full.
- Finish with honey: Drizzle a little honey over the top for a touch of sweetness.
Customization Ideas
Make these parfaits your own with these simple swaps and additions:
- Substitute granola: Use crushed nuts, chocolate chips, or even crumbled cookies for a different texture.
- Change the yogurt: Swap Greek yogurt for flavored options or plant-based yogurt for a dairy-free alternative.
- Add a surprise layer: Try a layer of chia pudding or a dollop of fruit compote for added flavor.
Why These Parfaits Are a Hit
- Healthy yet satisfying: Packed with protein, fiber, and antioxidants, they’re a guilt-free indulgence.
- Perfect for any time: Enjoy them as a dessert, breakfast, or snack.
- Visually appealing: The vibrant layers of berries, yogurt, and granola make them a feast for the eyes as well as the palate.
These layered berry and yogurt parfaits are proof that dessert doesn’t have to be heavy to be delicious. Give them a try, and you’ll love how quick, easy, and versatile they are!
4. No-Bake Oreo Pudding Cups
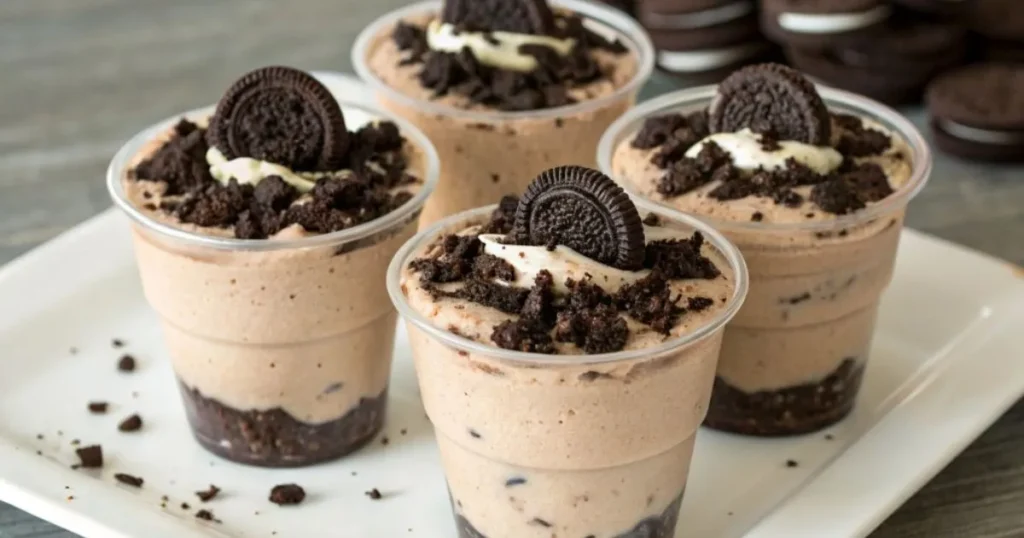
Calling all Oreo lovers! These no-bake Oreo pudding cups are the ultimate treat for anyone who loves the iconic chocolate-and-cream cookie. With layers of creamy pudding, crushed Oreos, and fluffy whipped topping, this dessert is a guaranteed crowd-pleaser. Best of all, it takes just minutes to assemble—making it perfect for last-minute gatherings or a quick indulgence at home.
Ingredients You’ll Need
The beauty of this recipe lies in its simplicity. You’ll need:
- Oreo cookies: Crushed for layers and whole for garnish.
- Instant pudding mix: Vanilla, chocolate, or cookies & cream flavor works best.
- Milk: For preparing the pudding mix.
- Whipped topping: Provides a smooth, creamy touch with each bite.
How to Make Them
Here’s how to put these delicious cups together:
- Prepare the pudding: Mix the instant pudding with milk according to the package instructions. Chill it in the refrigerator until set.
- Crush the Oreos: Place the cookies in a resealable bag and crush them into fine crumbs using a rolling pin or pulse in a food processor. Leave a few larger chunks for texture, if desired.
- Layer the ingredients:
- Start with a layer of crushed Oreos at the bottom of each cup.
- Add a generous layer of pudding on top.
- Add another layer of Oreos and repeat until the cup is filled.
- Top it off: Finish with a dollop of whipped topping and garnish with a whole Oreo or cookie crumbs for decoration.
Party Tip
Serve these in mini dessert cups or shot glasses for an elegant party presentation. Add a small dessert spoon to each for easy serving, and watch them disappear in no time!
Why You’ll Love This Recipe
- No baking required: A lifesaver when you’re short on time or don’t want to turn on the oven.
- Kid-friendly and fun: The simple steps make it a great recipe to involve the little ones.
- Customizable: Try flavored Oreos or swap the pudding flavor for a unique twist.
These no-bake Oreo pudding cups are everything you want in a dessert—delicious, easy to make, and universally loved. Whether for a party or a cozy night in, they’ll be a hit every single time. Go ahead and give them a try—you won’t regret it!
5. Tropical Mango Coconut Cups
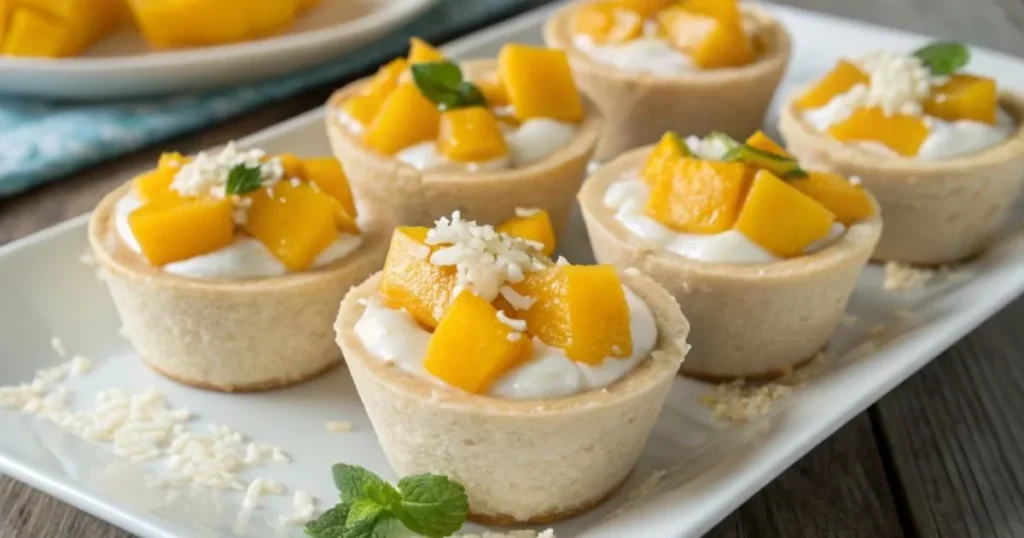
Take your taste buds on a vacation with these tropical mango coconut cups! Bursting with the bright, refreshing flavors of mango and coconut, these dessert cups are perfect for summer gatherings, barbecues, or whenever you need a sunny pick-me-up. The combination of creamy coconut and sweet mango is pure tropical bliss, and the vibrant colors make them as stunning as they are delicious.
Ingredients You’ll Need
Here’s everything you need to bring this tropical dessert to life:
- Mango puree: Fresh or canned, for a smooth and sweet mango layer.
- Coconut cream: Rich, creamy, and perfect for complementing the mango.
- Toasted coconut flakes: Adds a bit of crunch and enhances the tropical vibe.
- Optional extras: Lime zest or a drizzle of honey for added flavor.
How to Make Them
These cups are simple to assemble, no cooking required:
- Prepare the mango puree:For fresh mangoes, blend them until smooth to create a puree. Adjust sweetness with a touch of sugar if needed.
- Layer the ingredients:
- Start with a generous layer of mango puree at the bottom of the cup.
- Add a layer of coconut cream on top.
- Repeat until the cup is filled, alternating layers for a beautiful effect.
- Top with toasted coconut: Sprinkle toasted coconut flakes over the top layer for added texture and flavor.
Serving Suggestion
Use clear cups or glasses to showcase the gorgeous, vibrant layers. Garnish with a slice of fresh mango or a sprig of mint for an elegant touch.
Why These Dessert Cups Shine
- Tropical flavors: The combination of mango and coconut is a taste of paradise.
- No-bake convenience: Quick and easy to prepare without needing an oven.
- Perfect for summer: Light, refreshing, and ideal for hot weather.
- Visually stunning: The bright orange of the mango against the creamy white coconut is a feast for the eyes.
These tropical mango coconut cups are a little slice of summer in every bite. They’re perfect for impressing guests or indulging yourself with a refreshing treat. Ready to bring a tropical flair to your dessert table? Dive in and give this recipe a try!
Conclusion
In this post, we’ve explored five irresistible dessert cups recipes, each offering a unique twist on the classic sweet treat. From the rich and decadent classic chocolate dessert cups to the light and refreshing tropical mango coconut cups, there’s a dessert for every occasion and taste. Here’s a quick recap:
- Classic Chocolate Dessert Cups – A chocolate lover’s dream, perfect for any celebration.
- Fruity Cheesecake Dessert Cups – A no-bake, creamy dessert with the sweet touch of fresh fruit.
- Layered Berry and Yogurt Parfaits – A healthier yet indulgent option packed with protein and antioxidants.
- No-Bake Oreo Pudding Cups – A quick and easy favorite that’s sure to please everyone.
- Tropical Mango Coconut Cups – A refreshing, tropical treat that transports you straight to paradise.
Whether you’re hosting a party, planning a family gathering, or just looking for something sweet to treat yourself, these dessert cups are the perfect choice. Each one is simple to make, visually stunning, and bursting with flavor.
We’d love to hear from you! Which recipe are you most excited to try? Or do you have your own favorite dessert cup creation? Feel free to share your ideas and any fun twists in the comments below!
FAQs
Is it possible to prepare these dessert cups in advance?
Yes! Most of these dessert cups can be prepared in advance. Just layer the ingredients, cover them, and refrigerate until you’re ready to serve. This makes them a great option for meal prep or parties.
Can I substitute the fruit in the fruity cheesecake dessert cups?
Absolutely! These dessert cups are highly customizable. You can swap the fruit for your favorites or use whatever is in season. Berries, tropical fruits, or even caramelized apples can make a delicious change!
Can I freeze the leftovers of these dessert cups?
While it’s not recommended for all types of dessert cups, you can freeze some of them—particularly the ones with pudding or mousse layers. Just make sure to cover them well and allow them to thaw in the fridge before serving.
How do I adjust these dessert cups for larger portions?
To make larger portions, simply increase the ingredients in proportion. For a bigger serving, use larger cups or bowls and layer the ingredients as you would for individual servings. You can also double or triple the recipe to serve more guests.
Can I use non-dairy substitutes for these dessert cups?
Yes! Many of these dessert cups can be easily adapted to suit dietary preferences. Use dairy-free yogurt, coconut cream, or almond milk in place of dairy ingredients. Just make sure to choose substitutes that have a similar consistency for the best results.
Feel free to get creative with these dessert cup recipes—whether you’re adjusting them for dietary needs, making larger portions, or simply adding your favorite flavors. The possibilities are endless!
