A SpongeBob cake is a fun and creative way to bring the beloved cartoon character to life at any kids’ party. Whether you’re celebrating a birthday, a themed event, or just a fun gathering, a SpongeBob cake is sure to make the occasion unforgettable. With its bright colors, playful design, and endless decorating possibilities, this cake can be customized to suit any party theme. In this post, we’ll explore simple tips and creative ideas to help you make the perfect SpongeBob cake that will delight both kids and adults alike. Let’s dive into the world of SpongeBob and create a cake that’s as fun as his underwater adventures!
Table of Contents
Key Takeaways
Recipe Highlights
- Easy to Make: The SpongeBob cake recipe is beginner-friendly and perfect for all skill levels.
- Fun for Kids: Designed to delight children with its vibrant colors and familiar character design.
- Customizable: Use your favorite cake flavors, frostings, and decorations to make it your own.
- Party-Ready: A show-stopping centerpiece for birthdays or themed celebrations.
Unique Features
- Quick Prep Options: Includes time-saving techniques like edible images and no-bake designs.
- Versatile Designs: Choose from cupcakes, sheet cakes, or ice cream cakes to suit your needs.
- Interactive Elements: Add fun details like jellyfish or sea-inspired decorations for a creative touch.
- Kid-Friendly Process: Simple enough for kids to join in the decorating fun!
1) How to Make a Simple SpongeBob Cake
Creating a SpongeBob cake may seem like a challenge, but with the right approach, it’s a fun and rewarding experience—even if you’re new to baking! Whether it’s for a birthday or a themed party, this iconic cake will undoubtedly be the centerpiece of your celebration. Let’s break down the process step by step, so you can whip up a SpongeBob cake that will wow everyone.

Ingredients and Tools You’ll Need
Before you start, gather everything you need. Preparation is the key to a stress-free baking experience! Here’s what you’ll want to have on hand:
For the Cake:
- Your favorite cake mix or homemade sponge cake recipe (vanilla or chocolate works best).
- Food coloring (yellow for SpongeBob’s body, plus additional colors for details like his pants and tie).
- Buttercream frosting or fondant (depending on your preferred decorating style).
For Decorations:
- Edible black gel or chocolate for outlining features.
- Fondant tools for shaping SpongeBob’s face and details.
- Piping bags with fine tips for precise work.
Other Essentials:
- A SpongeBob cake mold (optional but handy for beginners).
- Offset spatula and cake smoother for clean finishes.
- Round and square baking pans.
Step-by-Step Instructions
- Bake the Cake Base
- Start by baking your cake in the chosen pans. A square pan works great for SpongeBob’s body, while a round one can be used for additional layers or accessories.
- Once baked, let the cakes cool completely before moving on to decoration. Pro tip: Chill the cakes in the fridge for an hour to make them easier to work with.
- Prepare the Frosting
- Divide your buttercream frosting into bowls and add food coloring. You’ll need yellow for SpongeBob’s body, brown for his pants, and white for his shirt. Don’t forget red for his tie and blue for his eyes!
- Assemble and Carve the Cake
- Stack the cake layers with a thin layer of frosting in between. If you’re feeling adventurous, carve the cake into a rough SpongeBob shape. If not, a simple square shape works just as well.
- Add a Base Layer of Frosting
- Apply a crumb coat—a thin layer of frosting that traps any loose crumbs—and let it set in the fridge for 15–20 minutes. Then, cover the cake with the final layer of yellow frosting for SpongeBob’s body.
- Bring SpongeBob to Life
- Use fondant or colored frosting to create SpongeBob’s facial features, tie, and iconic square pants. This is where you can let your creativity shine! Add details like his big, happy smile and expressive blue eyes.
- Use black gel or chocolate for outlining his features to make them pop.
Helpful Tips for Success
- Work in Layers: Building the cake layer by layer ensures stability and makes decorating easier.
- Start Simple: If you’re short on time, pre-made decorations like edible images can save the day.
- Practice Makes Perfect: If piping isn’t your strong suit, practice on parchment paper before decorating the cake.
With a little effort and these simple steps, your SpongeBob cake will be party-ready and full of charm. Remember, it doesn’t have to be perfect—kids will love it no matter what! Let your imagination guide you, and most importantly, have fun during the process.
2) Creative SpongeBob Cake Decorating Ideas
Decorating a SpongeBob cake is where the magic truly happens. This is your chance to transform a simple cake into a show-stopping centerpiece that will bring smiles to everyone at the party. But where do you start? Let’s dive into some fun and creative decorating ideas that will make your SpongeBob cake unforgettable.

1. Embrace SpongeBob’s Signature Look
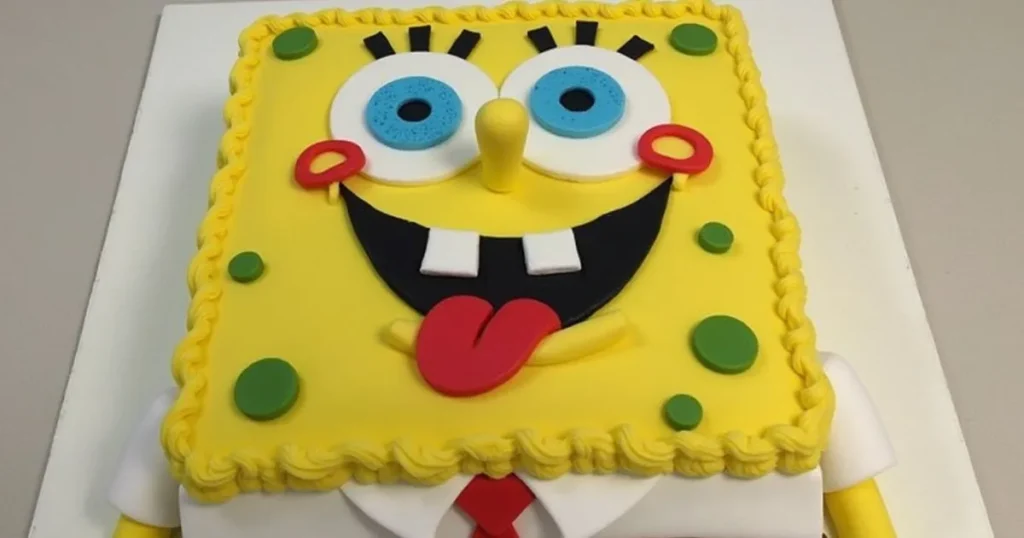
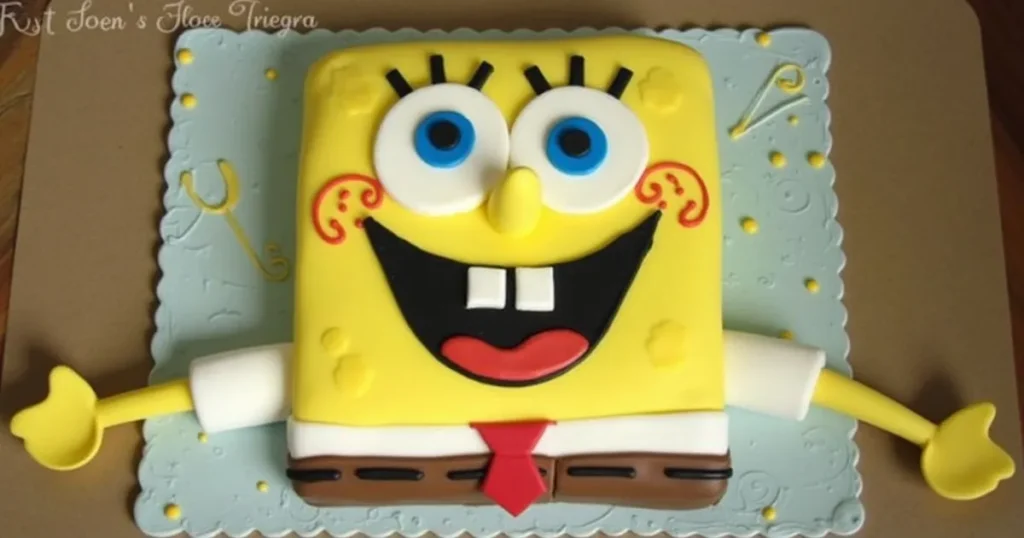
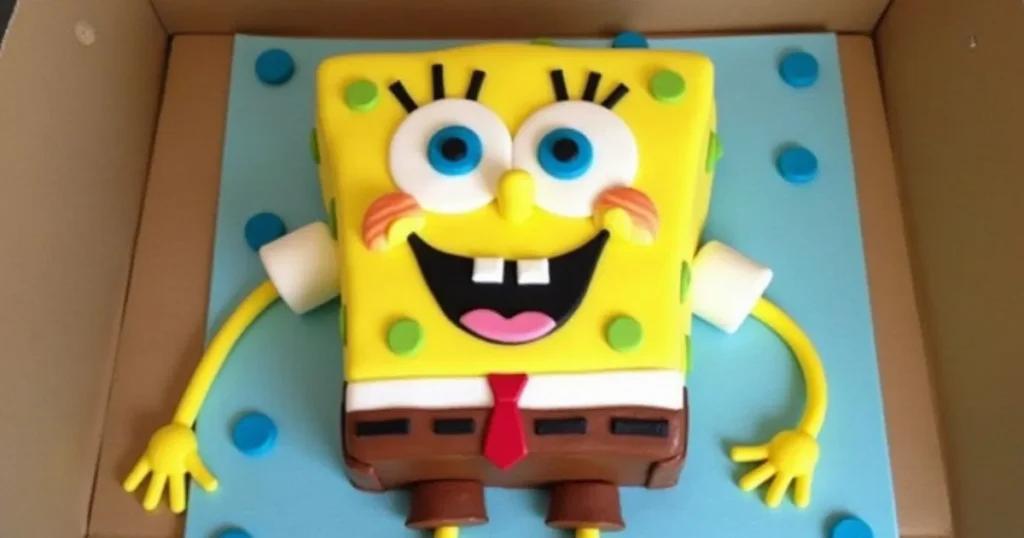
One of the easiest ways to make your cake stand out is by capturing SpongeBob’s cheerful personality. Start with his bright yellow body—this is the hallmark of a SpongeBob cake. Use yellow buttercream or fondant to cover the cake completely. From there, focus on adding details that showcase his fun and quirky look:
- Big Blue Eyes: Create them with white and blue fondant or by piping colored frosting. Don’t forget the eyelashes!
- Cheerful Smile: Use black edible gel or melted chocolate to outline his wide grin and add his teeth.
- Brown Square Pants and Red Tie: Use brown and red fondant or frosting to craft these iconic features.
This classic design will instantly remind everyone of their favorite underwater friend.
2. Add SpongeBob’s Friends for Extra Fun
Why stop at SpongeBob when you can include his friends from Bikini Bottom? Adding characters like Patrick, Squidward, or Sandy will take your cake to the next level. Here’s how you can do it:
- Edible Character Toppers: Use premade edible toppers of Patrick or Sandy to save time while keeping the theme cohesive.
- Fondant Figurines: Feeling ambitious? Mold small figurines of SpongeBob’s friends using fondant and food-safe tools.
- Scene Details: Add elements like jellyfish, bubbles, or seaweed around the cake to create an underwater scene.
This approach not only makes the cake visually appealing but also makes it a fun conversation starter at the party.
3. Keep It Playful with Texture
Texture adds depth and character to your cake, making it more visually interesting. Here are a few ways to incorporate texture into your SpongeBob cake:
- Sponge Texture: Use a clean sponge or textured rolling pin to mimic SpongeBob’s porous skin.
- Raised Features: Add raised elements like SpongeBob’s nose or cheeks using extra frosting or fondant.
- Edible Glitter: For a touch of whimsy, sprinkle edible glitter on the cake to mimic the shimmer of the ocean.
Small details like these can make your cake feel polished and professional.
4. Quick and Easy Decorating Hacks
Pressed for time? No problem! These simple hacks will help you create a stunning SpongeBob cake without spending hours in the kitchen:
- Edible Image Sheets: Purchase SpongeBob-themed edible image sheets to place directly on the cake.
- Piping Stencils: Use stencils to pipe clean and precise details, like SpongeBob’s smile or tie.
- Candy and Cookies: Decorate with colorful candies or cookies to represent SpongeBob’s features or accessories.
These shortcuts are perfect for busy parents or beginners looking to impress with minimal effort.
Bring SpongeBob to Life with Your Creativity
There’s no right or wrong way to decorate a SpongeBob cake—it’s all about having fun and adding your personal touch. Whether you go all out with intricate details or keep it simple with clever hacks, your cake will undoubtedly be a hit. The most important thing is to enjoy the process and watch as your SpongeBob masterpiece comes to life, ready to make any kids’ party extra special!
3) Easy SpongeBob Cake Designs for Busy Parents
Let’s be real—between planning the party, picking up decorations, and organizing activities, finding time to bake and decorate a cake can feel like a challenge. But don’t worry! You don’t need to be a professional baker to create a stunning SpongeBob cake. With these easy design ideas, you can craft a cake that looks amazing while keeping things stress-free.
1. The Classic Square SpongeBob Cake
If you’re short on time, a simple square cake is your best friend. This design focuses on SpongeBob’s signature square body, which is not only easy to replicate but also instantly recognizable. Here’s how you can pull it off:
- Bake a Sheet Cake: Use a rectangular or square pan to get the perfect base shape.
- Frost with Yellow Buttercream: Spread a smooth layer of yellow frosting for SpongeBob’s body.
- Add Quick Features: Use edible gel pens or pre-cut fondant shapes for his eyes, mouth, and pants.
This straightforward approach is beginner-friendly but still packs plenty of SpongeBob charm.
2. SpongeBob Cupcake Trio
Don’t feel like dealing with a large cake? Go for cupcakes! SpongeBob cupcakes are just as adorable, and they’re perfect for serving individual portions.
- Yellow Cupcakes: Bake cupcakes and frost them with yellow buttercream to match SpongeBob’s color.
- Add Facial Features: Use candy eyes, chocolate chips, or fondant pieces to create SpongeBob’s expressions.
- Fun Variations: Include Patrick and Squidward cupcakes to make it a fun character trio.
Cupcakes are quick, mess-free, and a guaranteed hit with kids!
3. No-Bake SpongeBob Ice Cream Cake
Want to skip baking altogether? A no-bake ice cream cake is a delicious and easy alternative:
- Layer Your Ice Cream: Use a rectangular mold to layer vanilla and chocolate ice cream.
- Decorate the Top: Cover the frozen cake with whipped cream or yellow frosting.
- Add SpongeBob Details: Use fondant or edible markers for his face and accessories.
This chilled treat is perfect for warm-weather parties and requires minimal effort.
4. Themed Sheet Cake with Edible Images
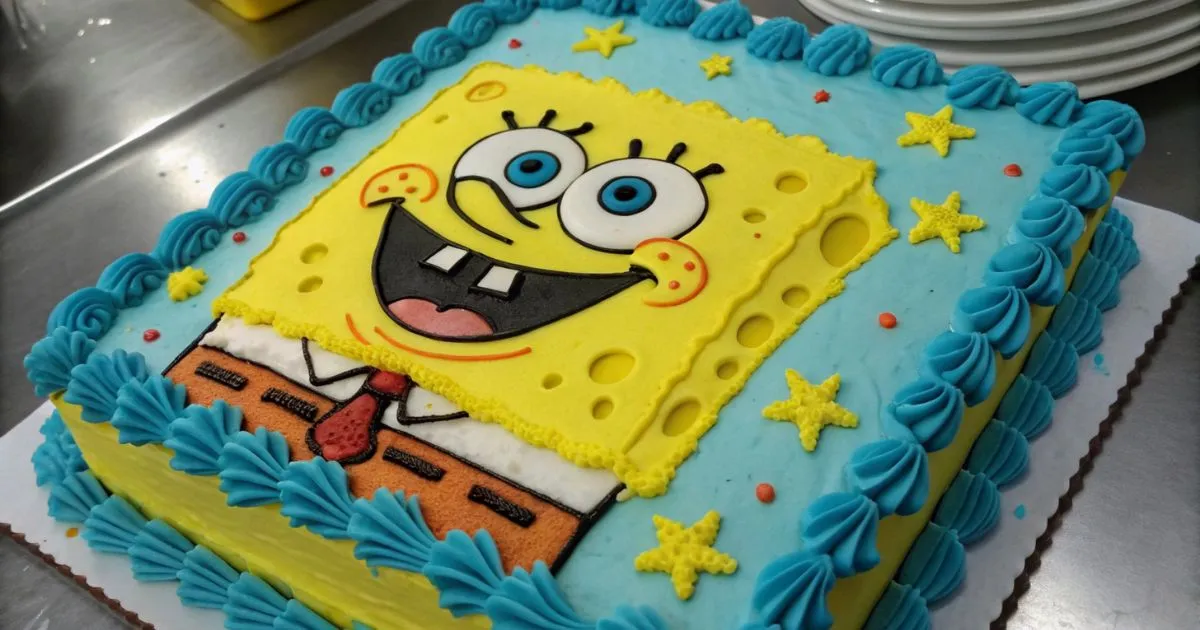
For the ultimate time-saver, consider using edible image sheets. These pre-made decorations are printed with SpongeBob designs and can transform any cake in minutes.
- Frost Your Cake: Start with a smooth layer of frosting (vanilla or chocolate works well).
- Apply the Edible Image: Gently place the SpongeBob image on top, smoothing it out for a clean finish.
- Add Borders and Sprinkles: Use colorful piping or sprinkles around the edges for an extra festive touch.
This method is quick, hassle-free, and delivers a polished, professional look.
Make It Your Own
Remember, these designs are just starting points. Feel free to get creative and adapt them to your preferences or the party theme. Whether you’re baking from scratch, using store-bought cake layers, or opting for no-bake solutions, the goal is to create something fun and memorable without unnecessary stress.
Busy parents, rejoice! With these easy SpongeBob cake ideas, you’ll have more time to focus on what matters most—celebrating with your little one and making memories that will last a lifetime.
4) Tips for Making the Perfect SpongeBob Cake
Creating a SpongeBob cake is more than just following a recipe—it’s about adding your own personal touch while keeping things fun and stress-free. Whether you’re a seasoned baker or trying this for the first time, a few tips can make all the difference. Let’s dive into some tried-and-true strategies to help you craft the perfect SpongeBob cake.

1. Start with a Solid Pla
Every masterpiece begins with a blueprint, and your SpongeBob cake is no exception. Take a few minutes to plan out your design before you start.
- Sketch Your Cake: Draw a simple sketch of your SpongeBob design, including his features and any additional decorations.
- Choose Your Tools: Make sure you have all the tools and ingredients ready, from piping bags to food coloring.
- Time Management: If you’re baking for a party, start a day or two in advance to avoid last-minute rushes.
A little preparation goes a long way in keeping the process smooth and enjoyable.
2. Use the Right Coloring Techniques
SpongeBob’s bright yellow color is iconic, so getting the shade just right is key. Here are some tips to nail it:
- Gel Food Coloring: Use gel-based colors instead of liquid for vibrant shades without altering the frosting’s texture.
- Blend Gradually: Add the coloring a little at a time, mixing thoroughly until you achieve the perfect hue.
- Multiple Shades: Don’t forget to prepare smaller batches of frosting in brown, red, and blue for SpongeBob’s pants, tie, and eyes.
Consistent, vibrant colors make your cake look polished and professional.
3. Master the Art of Frosting
Smooth frosting is the foundation of any great-looking cake, but it’s not always easy to achieve. Here’s how you can perfect it:
- Crumb Coat First: Apply a thin layer of frosting to seal in crumbs before adding the final coat. Chill the cake for 15–20 minutes after this step.
- Use the Right Tools: An offset spatula and a bench scraper are your best friends for smooth finishes.
- Patience is Key: Take your time when frosting—rushing can lead to uneven surfaces.
If you’re using fondant, roll it out evenly and smooth it gently over the cake to avoid tears or wrinkles.
4. Add Eye-Catching Details
The details are what bring SpongeBob to life, so don’t be afraid to go all out!
- Facial Features: Use fondant or frosting to create SpongeBob’s eyes, nose, and signature smile. Black edible gel works wonders for outlines.
- Textured Skin: Give SpongeBob’s “sponge” texture by dabbing the frosting lightly with a clean sponge or textured tool.
- Interactive Elements: Add edible decorations like jellyfish, seashells, or starfish to create an underwater scene around the cake.
Small details make a big impact and will have everyone admiring your creativity.
5. Test and Taste
No one wants a cake that looks great but doesn’t taste good. Always take a moment to test your flavors and combinations before the big day.
- Flavor Pairings: SpongeBob is all about fun, so consider playful flavors like vanilla with lemon frosting or chocolate with caramel filling.
- Moisture Check: Dry cakes are a no-go. Use simple syrup between layers to keep your cake moist and flavorful.
- Taste Test: Make a mini cupcake or sample a spoonful of frosting to ensure everything is just right.
A delicious SpongeBob cake will leave a lasting impression long after the party ends.
6. Don’t Stress the Small Stuff
Remember, your SpongeBob cake doesn’t need to be perfect—it just needs to bring joy. Kids will love it no matter how it turns out, and imperfections often add charm to homemade creations.
If something doesn’t go as planned, improvise! Spilled frosting? Turn it into a wave or bubble. Forgot a detail? Add it later with edible markers or candies.
Creating a SpongeBob cake is as much about the journey as it is about the final result. By following these tips and adding your own creative flair, you’ll end up with a cake that’s as delightful as SpongeBob himself—fun, colorful, and full of personality!
5) SpongeBob Cake Storage and Serving Tips
So, you’ve crafted the perfect SpongeBob cake—it looks amazing, and you can’t wait to share it. But what’s next? Proper storage and serving can make all the difference in preserving the cake’s taste and appearance. Let’s talk about how to store and serve your SpongeBob cake like a pro.
1. How to Store Your SpongeBob Cake
Keeping your cake fresh and flavorful is key, especially if you’ve prepared it a day or two ahead of the party. Here’s how you can store it to maintain its perfection:
- Short-Term Storage (1–2 Days):
- Cover the cake with a dome or place it in an airtight container to prevent it from drying out.
- If it’s frosted with buttercream, keep it at room temperature in a cool, dry place. Avoid direct sunlight, which can melt the frosting.
- For fondant-covered cakes, store them in a cake box at room temperature to avoid moisture issues.
- Long-Term Storage (Up to 3 Months):
- Wrap the cake tightly in plastic wrap to prevent freezer burn, then place it in an airtight container.
- Store it in the freezer and defrost it in the refrigerator the night before serving.
- Avoid freezing cakes with delicate decorations, as thawing may cause them to lose shape.
Proper storage ensures your SpongeBob cake stays fresh and ready to impress.
2. Serving the Perfect Slice
When it’s time to serve your SpongeBob cake, presentation matters just as much as taste. Here are some tips to make the experience memorable:
- Use a Sharp Knife: A long, serrated knife is ideal for cutting clean slices without smudging the frosting or decorations.
- Serve at the Right Temperature:
- For buttercream cakes, room temperature is best to enjoy the creamy texture.
- For ice cream cakes, let them sit for 5–10 minutes after removing from the freezer to make slicing easier.
- Portion Wisely:
- For a standard SpongeBob cake, cut into even squares or triangles for easy serving.
- Consider the audience—smaller slices work well for kids, while larger pieces might be preferred for adults.
Pro tip: Wipe the knife clean between slices to keep the presentation neat.
3. Creative Ways to Serve Your SpongeBob Cake
Why not go beyond the traditional and make serving your SpongeBob cake part of the fun? Here are some creative ideas to wow your guests:
- Themed Plates and Napkins: Enhance the SpongeBob vibe with plates and napkins featuring Bikini Bottom characters.
- Cake Pops from Leftovers: Use any leftover cake scraps to make SpongeBob-themed cake pops for a fun bonus treat.
- Interactive Dessert Bar: Serve the cake alongside toppings like whipped cream, sprinkles, and edible glitter, letting guests customize their slices.
Adding these touches makes the experience even more delightful for kids and adults alike.
4. Troubleshooting Common Cake Issues
Sometimes, things don’t go as planned, but a little troubleshooting can save the day.
- Dry Cake: Brush each slice with a simple syrup (equal parts sugar and water) to restore moisture.
- Smudged Decorations: Use extra frosting or fondant to touch up any imperfections. No one will know the difference!
- Uneven Slices: If presentation matters, use a cake slicer or guide to ensure consistent pieces.
These quick fixes ensure that any hiccups are easily managed, leaving you free to enjoy the party.
A Sweet Conclusion
Serving your SpongeBob cake is the final step in a fun, rewarding process. By taking care of storage and embracing creative serving ideas, you’ll ensure that your cake not only looks amazing but tastes just as incredible. Whether you’re handing out slices to a room full of kids or sharing a piece with family, your SpongeBob cake will undoubtedly be the highlight of the celebration!
Conclusion
Making a SpongeBob cake for your child’s next party is a fun and creative way to celebrate. Whether you’re crafting a simple design or going all out with fun decorations and party-themed elements, a SpongeBob cake is sure to be the star of the show. With the tips and ideas shared in this post, you can confidently bake a cake that both kids and adults will love. From using easy-to-find decorations to incorporating SpongeBob’s iconic friends, your cake will be the highlight of any celebration. So grab your baking tools, let your creativity flow, and create a SpongeBob masterpiece that will make your kid’s party unforgettable!
FAQs About Making a SpongeBob Cake
Q: Can I make a SpongeBob cake without fondant?
A: Absolutely! You can achieve SpongeBob’s iconic look using buttercream frosting. Use piping techniques to create his features, and edible markers or gel icing for finer details like his smile and eyes.
Q: How far in advance can I make the SpongeBob cake?
A: You can bake the cake layers up to two days in advance. Keep them wrapped in plastic wrap and store at room temperature for optimal freshness.If decorated, refrigerate the cake up to a day before the event. Just let it come to room temperature before serving for the best taste and texture.
Q: What type of food coloring works best for SpongeBob’s bright colors?
A: Gel food coloring is the best option. It creates vibrant colors without thinning out your frosting. For SpongeBob’s yellow, use a high-quality gel that won’t fade over time.
Q:Is it okay to use a boxed cake mix instead of preparing the cake from scratch?
A: Yes, using a boxed cake mix is a great time-saver! Choose your favorite flavor and focus your creativity on the decorating. Add a splash of vanilla or a teaspoon of zest to enhance the flavor.
Q: What if I don’t have a SpongeBob-shaped cake pan?
A: No worries! A rectangular or square pan works perfectly. Once baked, carve the cake into SpongeBob’s shape using a stencil or freehand, then decorate accordingly.
Q: How do I transport the SpongeBob cake safely?
A: Use a sturdy cake box or carrier to prevent damage. If it’s a hot day, consider adding an ice pack beneath the carrier to keep the frosting stable. Drive carefully, avoiding sharp turns or sudden stops.
Q: Can I make a SpongeBob cake without dairy or eggs?
A: Yes! Substitute plant-based milk (like almond or oat) and use a flaxseed or applesauce replacement for eggs. Many dairy-free frostings are available too, ensuring everyone can enjoy your creation.

1 thought on “Make a SpongeBob Cake”
Comments are closed.